Export Movies
Use the Movies option to export images:
- To a QuickTime movie (.mov) or,
- Individual JPEG images to be made into a movie using third party software
This feature is primarily used with the Pearl Imaging System. An animal injected with fluor-labeled dye can be imaged at regular intervals. The Movies option allows the images to be compiled into a movie so the path of dye through the animal can be visualized.
To export a movie:
-
Click the Image Studio Application button, point to Export, then point to Additional Options, and then click Movies.
The Movie Properties dialog will open.
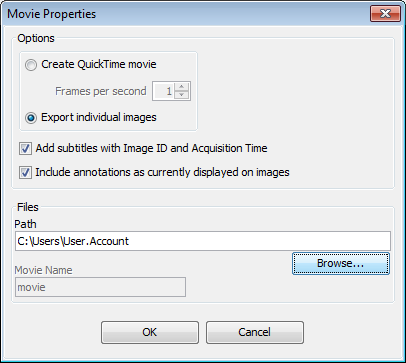
- In the Movie Properties dialog, check the appropriate option next to Create QuickTime movie or Export individual images.
- The frame rate can be adjusted up to a maximum of 10 frames per second.
- If the Add subtitles with Image ID and Acquisition Time box is checked, the Image ID and Acquisition Time from the Images table will be added below the image.
- If the Include annotations as currently displayed on images box is checked, all displayed annotations (such as shapes added for analysis) will be included in the movie.
- Click Browse to find the correct location where the movie or images should be exported.
- The Movie Name text field will be active if the Create QuickTime movie box is checked. Type a name for the movie.
- Click OK to export.
Images being used to make a movie must be the same resolution and scan area.
To do this:
A) Use the Filter option to filter the Images table so only images of the same resolution and scan area are present in the table.
B) Or, select the images to be exported and filter by selection.
Filter the Table for more detailed information.