Welcome to the LI‑COR® Acquisition Software Help!
Verification Plate for the Odyssey® DLx Imager or Odyssey CLx Imager
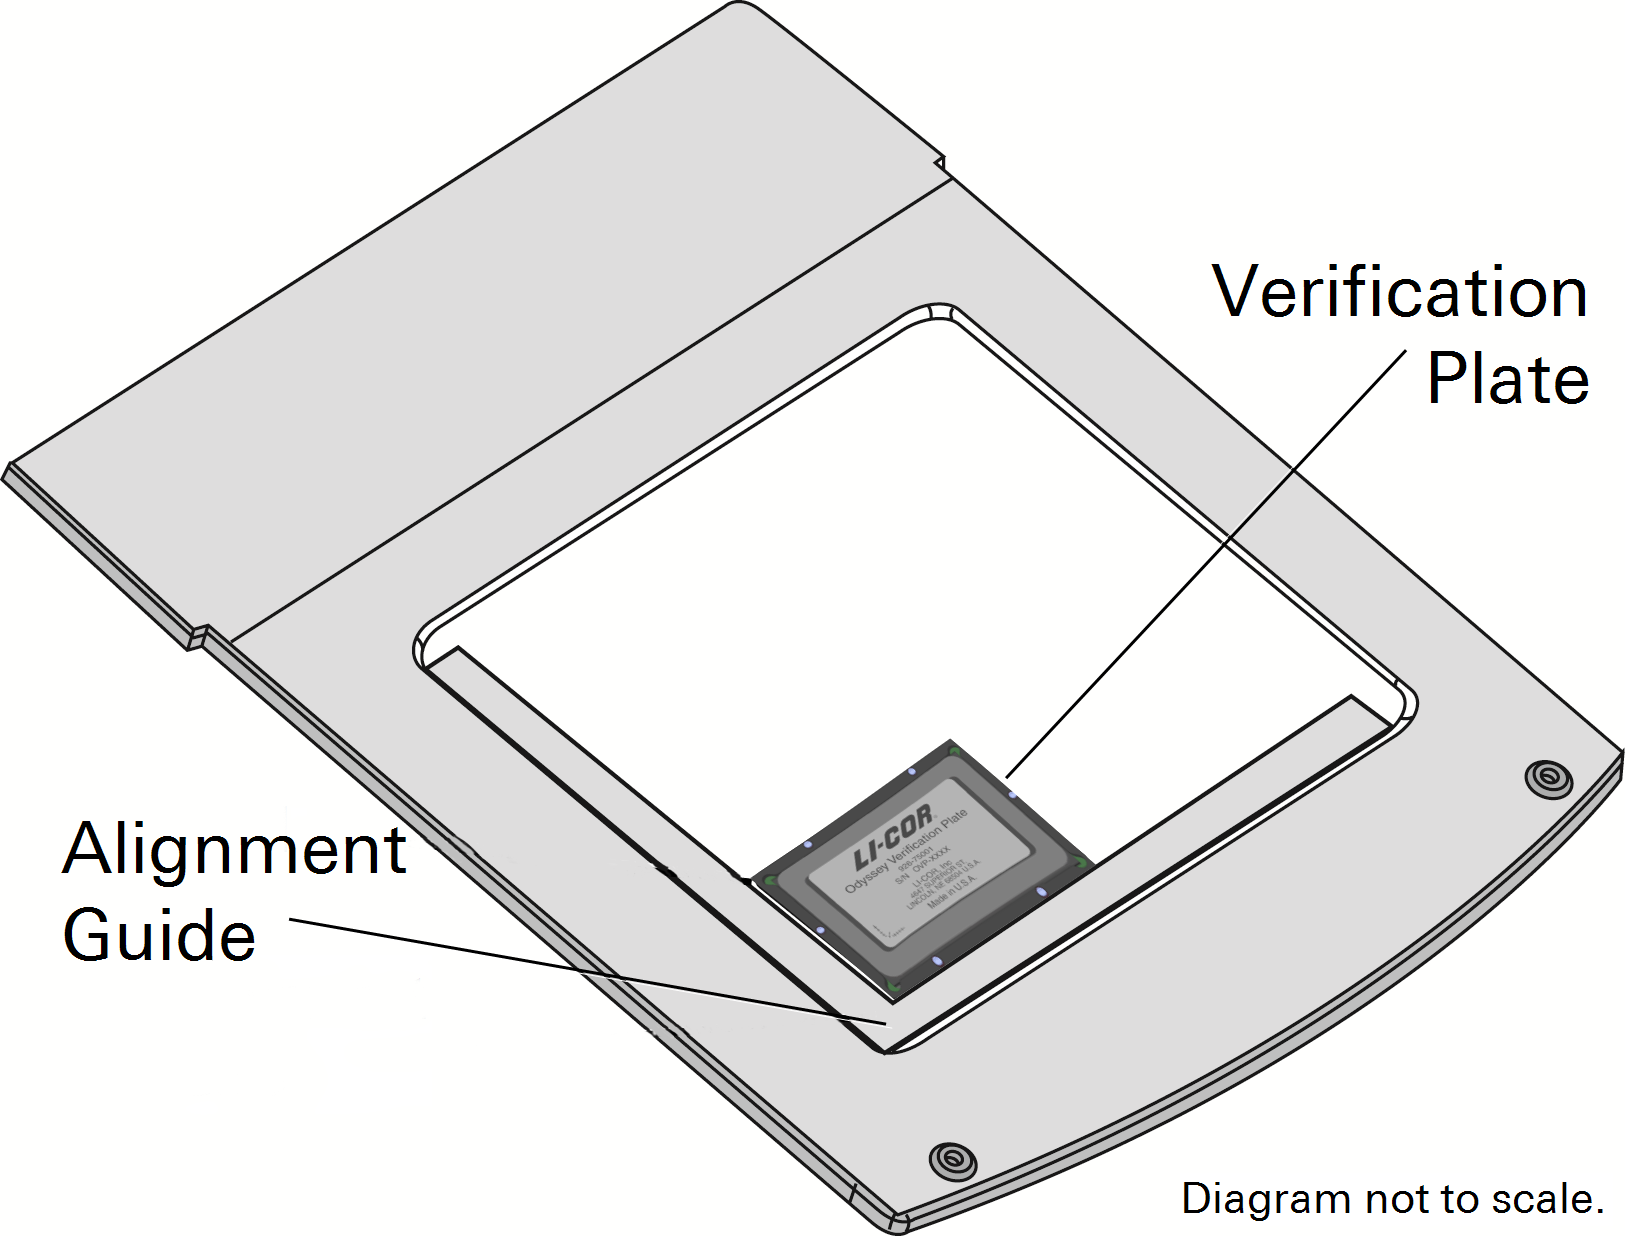
The Odyssey verification plate (PN 926-75001) is an optional accessory available for the Odyssey DLx and Odyssey CLx. The verification plate is used to verify that the imager is operating as expected. More information about the verification plate is available on the regulatory products page.
Before You Begin
Re-certify the verification plate annually. Contact biosupport@licor.com to request the re-certification service (service number 926-75005).
Handle the verification plate with powder-free gloves.
Store the verification plate in the envelope it ships with.
Only touch the plate by the black outer casing.
Never touch the stainless steel part of the plate.
Never attempt to clean the plate yourself. If the stainless steel face becomes contaminated, return the plate to LI‑COR Biosciences for cleaning and re-certification.
Position the Plate
Ensure the instrument's scan bed is clean, dry, and free of any residue or dust.
-
Place the alignment guide (PN 926-72200) in the front left corner of the instrument.
-
Place the verification plate with the stainless steel section down, the text facing up, and the left/bottom sides of the verification plate contacting the alignment guide.
Repeat the scan in the other three corners using the alignment guide to align the plate in each corner. Do not rotate the plate.
Scan the Plate
-
Start LI‑COR Acquisition Software
 , if you have not already.
 -
Select your Username and Image Data Folder.
-
Click Scan
 .
. -
Choose the imager you want to connect to.
-
Click Connect.
-
Click the imager name displayed in the top left corner of the LI‑COR Acquisition Software window.
-
In the menu that opens, select .
-
Enter the verification plate's serial number and each channel's verification coefficient (from the Certificate of Verification).
-
Click .
Prompts in the software will tell you where to place the verification plate on the Scan Surface. The plate will be scanned in all four corners of the Scan Surface.
-
When the scan completes, click Export to export a file that can be analyzed.