Moving Files from One Work Area to Another or Backing Up Work Areas
-
Open the Work Area that has the files you would like to move or that you would like to create a backup copy of.
-
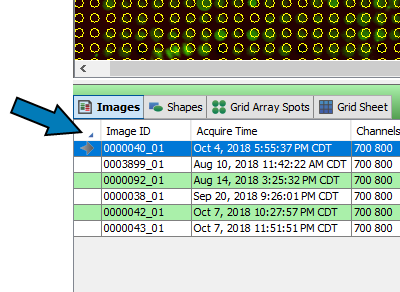
Once the Work Area is open, select the images in the Images Table (Ctrl + Click or Shift + Click shortcuts will work to select multiple files) that you would like to move. Avoid moving or backing up more than 200 images at a time. If you would like to select all the images in a Work Area click on the small arrow indicated below.
-
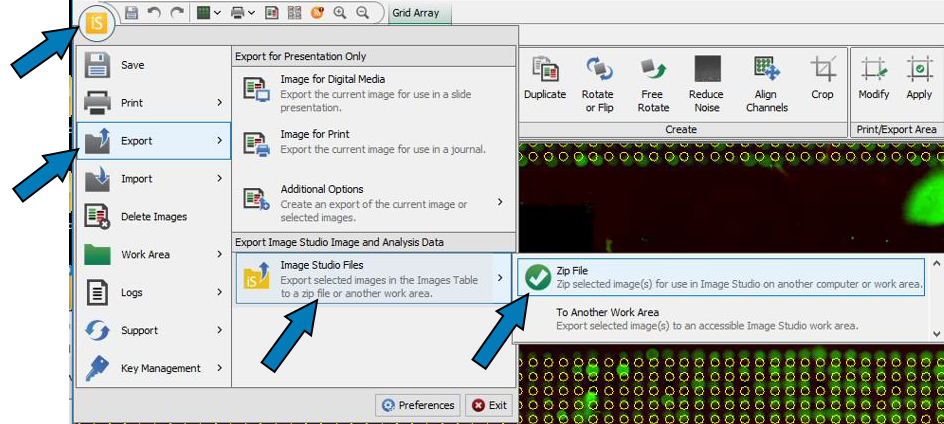
When the images have been selected, click on the round Image Studio button in the top left corner. From there, click on Export then Image Studio Files then Zip File as indicated by the arrows in the following screen shot.
-
A standard Windows save dialog box will open that will allow you to save the zip file to a location of your choosing. The file name can be changed to help in organizing files. Click Save when you have browsed to the chosen save location.
-
If files were being moved, open the second Work Area and from the round Image Studio button this time choose Import then Image Studio Zip File and browse to the location the zip file was saved to in step 4 and select in by double clicking or selecting and clicking on Open in the bottom right corner.