Lanes Group
When a Western Analysis is applied to an image, lane lines are created equally spaced in a boundary using the number of lanes specified in the Lanes group.
To change the lanes, use the controls in the Lanes group to redraw the boundary and specify the number of lanes.
If there are already lanes defined on the current analysis, redrawing the boundary deletes those lanes. Nothing is preserved from the deleted lanes such as edited bands.
To redraw the boundary:
- Click the Redraw Boundary button.
- Click the upper left corner of the area to define and drag the boundary box to the bottom right of the area to define, then release the mouse button.
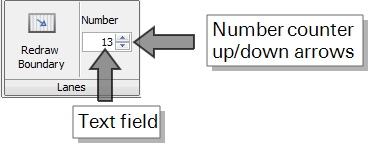
- Use the Number counter to increase or decrease the number of lanes. You can use the Up and Down arrows to increase or decrease the number, or type the number of lanes in the text field.
-
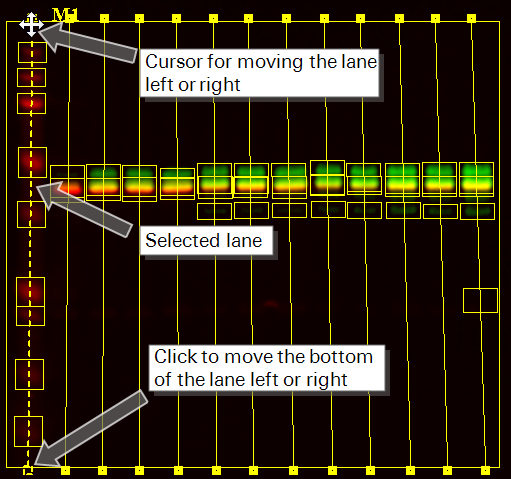
- After the lanes are defined, you can manually fine tune them by moving the lanes. Click the lane to select it, then drag the top or the bottom to tilt it or hold down the shift key to move the whole lane left or right to a new position. To select more than one lane to move or tilt, hold down the CTRL key while clicking (selecting) the lanes. Move the cursor to the top or bottom of the lane and when the cursor turns to the four-pointed arrow, drag it left or right to tilt the group; or hold down the SHIFT key, drag the cursor left or right to move the group.
After band finding is complete, if you move or resize a lane, the band-finding process is repeated using the same parameters.
During the Find Bands process, the lanes are adjusted to optimize their intersection with the bands.