Export Multiple Images in Batch
Use Selected Images as Separate Files to export all selected images in the Images table as individual images.
To use Selected Images as Separate Files:
- Select all the images that need to be exported in the Images table.
-
Click the Image Studio Application button, point to Export, then point to Additional Options, and then click Selected Images as Separate Files.
The Export Selected Images dialog will open.
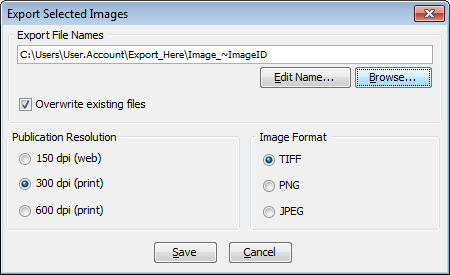 Choose an image format...
- Select the box next to the desired format for the exported image.
- The TIFF format is better for print publications. The PNG and JPEG formats use less file space and are convenient for digital media applications.
Image Formats to learn about TIFF, JPEG, and PNG image formats and their uses.
Choose an image resolution...- Select the box next to the desired resolution (in dots per inch) for the exported image. The chosen resolution will remain the same even if the image size is modified in the Size section of the dialog.
- Use 150 dpi for digital media and 300 or 600 for print.
-
To name the exported files, click Edit Name.
The Edit File Name dialog will open.
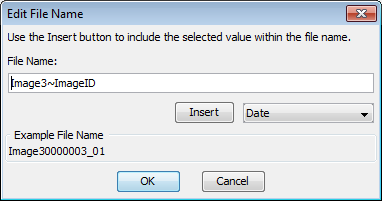
Only one file name can be designated to all images exported in the same batch, but a value from the Images table can be added to the end of each file name to distinguish exported images. See Insert values from the Images table into the file name below.
Edit the file name for all exported images in the Edit File Name dialog...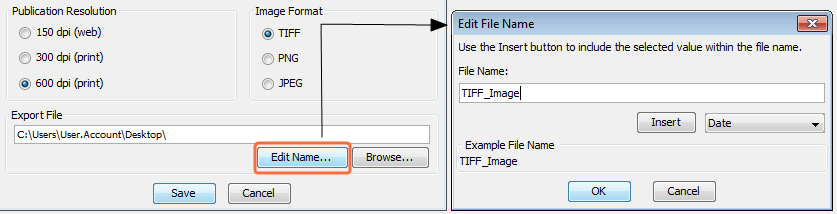
- Type the desired file name at the beginning of the File Name: text field.
- Any unwanted characters that may already appear in the File Name: text field can be deleted.
Insert values from the Images Table into the file name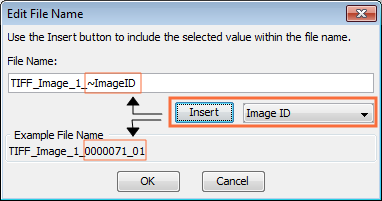
- Click the dropdown menu to the right of the Insert button to insert a column value from the Images table.
- Click the desired value once to highlight it.
- Click Insert.
- A variable representing the Images table value is inserted into the File Name: text field preceded by a tilde (~).
- How the file name will appear after export is shown in the Example File Name box at the bottom of the Edit File Name dialog.
- Multiple variables can be added to the file name.
- To remove unwanted variables in the File Name: box, place the cursor in the text field and manually delete the variable name including the tilde.
-
Click Browse to find the folder where the image will be exported.
The Selected Images Export dialog will open.
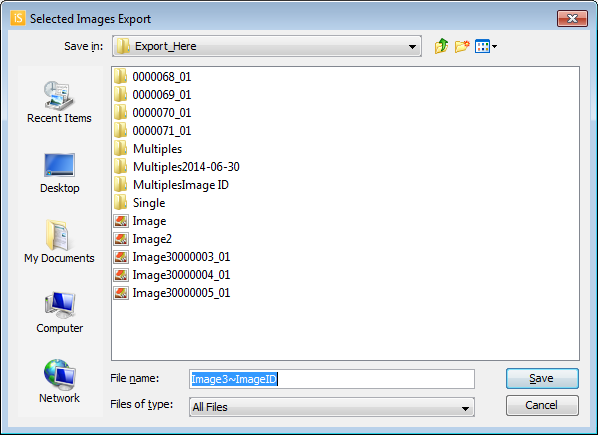
- In the Selected Images Export dialog, double click to open the folder where the image should be exported and click Save.
- Click Save in the Export Selected Images dialog and the batch of images will be exported.