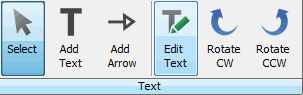
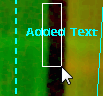
Adding Text
Click Features at the top left corner of the Display panel to toggle between displaying and hiding all features on the image. Features include Bands, Lanes, Wells, Spots, Annotations, and more. Select specific features to display or hide on the Show group in each Analysis tab.
Set the Text Attributes
Before you add the text you may want to specify the color, font, and size of the annotation. You can also do this after you've added the text by selecting the text and then changing the attributes.
Use the controls in the Font group of the Annotation tab to specify the text properties.

-
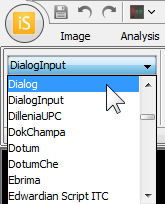
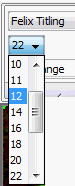
To specify the font, use the drop-down menu and select the font from the list.
-
To specify the font size, use the drop-down menu and select the font size from the list. You can also click the Larger or Smaller buttons in the Font group.
-
Click Annotation Color
 to open the Annotation Color dialog. Click the desired single color or color pair. If you select a color pair, the first color shown appears on reverse gray scale images and the second color appears on all other images.
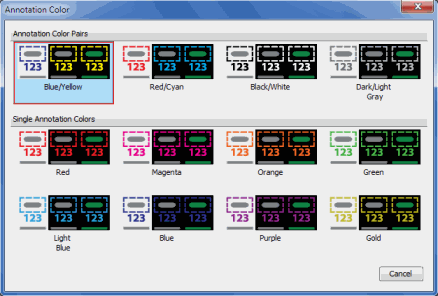
Add the Text
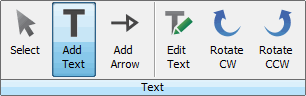
- Click Add Text in the Text group of the Annotation tab to add text to the image.
-
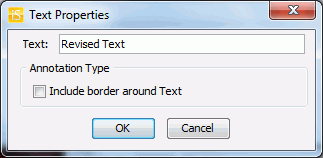
Click the spot on the image where you want to add the text. The Text Properties dialog is displayed.
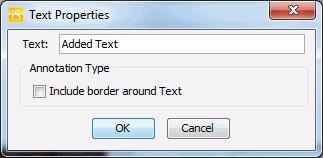
- In the text field, type the text that you want to add to the image.
- In Annotation Type, click the check box if you want to include a border around the text.
- Click OK. The text is added to the image.
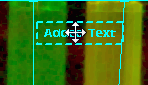
Reposition the Text
After you have added the text, you may want to adjust its placement -- move it up or down or to another spot on the image.
-
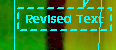
Click Select and select the text.
If the text is close to a lane or a band, the easiest way to select the text is to use the cursor to drag a small box through the center of the text.
- The text will be boxed with a dotted line, and the cursor changes to four arrows.
- Use the mouse or the direction arrows on your keyboard to move the selected text in any direction.
- When the text is where you want it, click anywhere else on the image to de-select the text.
Edit the Text
You can change the text font, the font size, and the font color of selected text. You can also change font properties: Bold and Italic, and increase or decrease the size in incremental steps using the Larger and Smaller buttons. You can also edit the words.
- Click Select and select the text that you want to edit by clicking on the text or dragging a box over the text.
- Click the Edit Text button in the Text group of the Annotation tab.
- The Text Properties dialog is displayed with the wording of the selected text displayed.
- Edit the text. You can type over the selected text, or you can delete the selected text first.
- Click OK. The revised text replaces the text on the image.
- Click anywhere else on the image to de-select the text when you have finished.