Pearl® Imaging System Acquire Tab
The Acquire tab contains controls for acquiring a new image on the Pearl Imaging System.

Setup
Image Table Info
To enter values for user-editable columns in the Images table:
-
Click Image Table Info
 in the Setup group.
The Image Table Information will open.
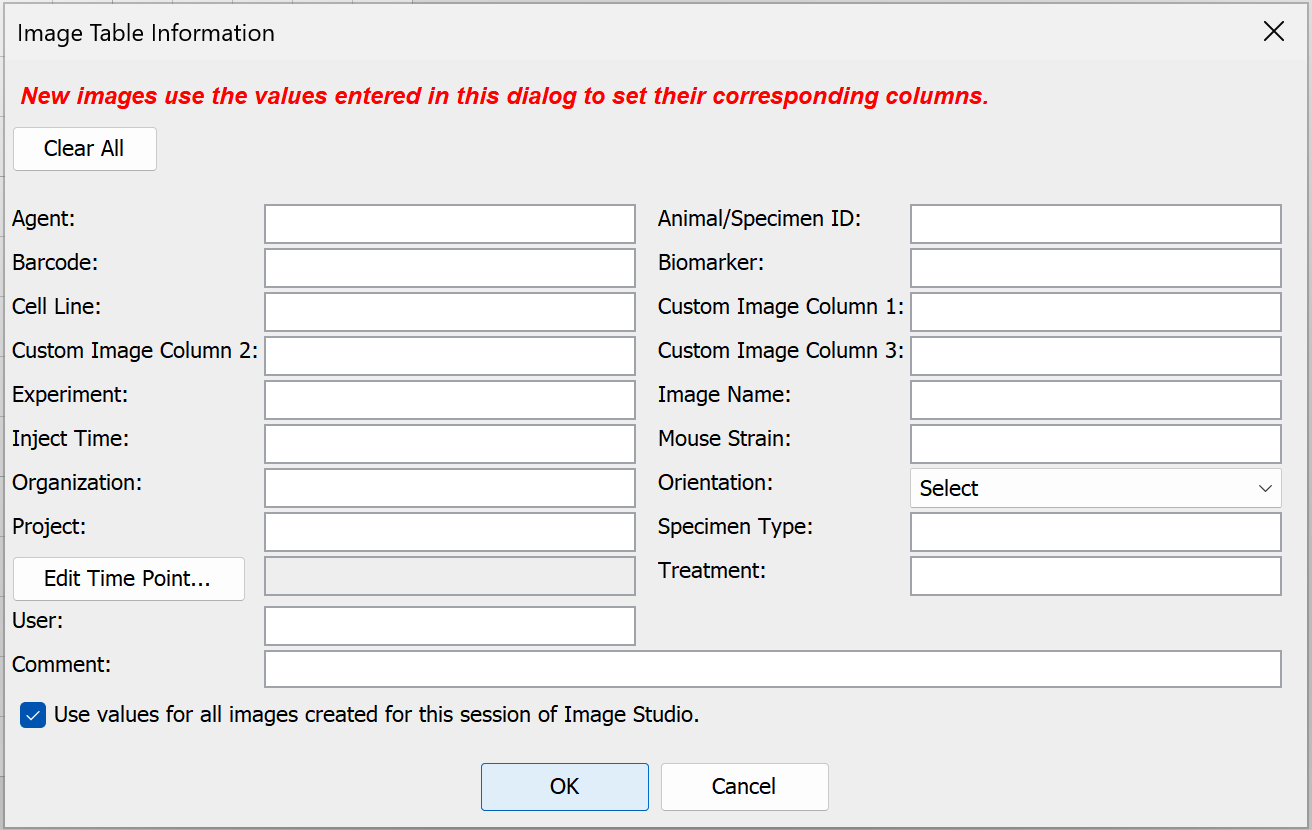
- In the Image Table Information, enter values in any available field.
- Click OK. The values you entered will be saved to the Images table for the acquisition.
Heater Plate
Use the first button to turn the heater plate in the instrument on or off. The heater plate is on when the On/Off button is highlighted.
Click Set and select the desired temperature from the drop down menu. The Actual button shows the current temperature of the heater plate. The icon is red when the set temperature is more than one degree different than the current temperature. The icon changes to blue when the current temperature is within one degree of the set temperature.
Channels
Use the controls in the Channels group to select the channel(s) to acquire.
The Intensity fields control the detector sensitivity and affect the band intensity on the image.If the intensity is set too high, the detector may saturate and produce white areas in the middle of intense bands/dots. Saturated pixels are colored blue when the image is displayed in grayscale (see the Display topic for how to display images in grayscale).If the intensity is set too low, the image may not show any fluorescence even though there is adequate signal from the samples.
Camera Controls
Use the controls in the Camera Controls group to set the Resolution, Focus Position, and acquisition method.
- Resolution — Select 170 µm for most scans.
-
Focus Position — Choose the appropriate focus position from the list.
Use the focus position option if the appropriate focus position is unknown...-
Click Focus Position at the bottom of the list.
The Focus Position dialog will open and test images will be acquired at each position.

- Once all test images have been acquired, click a position on the Focus Position slider to view the image for that position. Compare the images and determine the best position.
-
With the best position selected on the slider, click OK.
The Focus Position will be set to the chosen value.
-
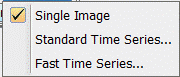
- Time Series — Select the time series option to use. Select Single Image to acquire one image, or Standard Time Series to acquire a series of images. The Pearl Imaging System acquires a series of images with minimal time between each image using the Fast Time Series.
Camera
Use the controls in the Camera group to start the scan.
-
Acquire Image — Starts the image acquisition using the currently displayed parameter values. The status of the acquisition is displayed in the Status group. It also shows the channel being acquired, and the acquisition is listed in the Images table.
-
Pause — Stops the current acquisition. The button changes to Resume. Click Resume to restart the current acquisition. The button changes again to Pause.

-
Stop — Stops the current acquisition.
-
Cancel — Cancels the current acquisition. All existing and pending channel images are discarded.
Camera Options
Click the Camera Options dialog launcher at the lower right corner of the Camera group to open the Camera Options dialog.
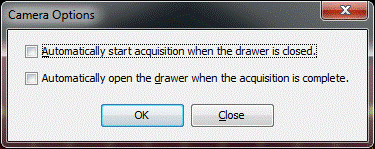
Two options are available. Enable the box to select the option. Click OK.
- Set the instrument to acquire an image automatically after the drawer is closed.
- Set the drawer to open automatically after the instrument acquires an image.