Grid Group
A grid is placed on the image based on the last used settings when a Grid Analysis is applied.
- Click the Redraw Boundary button and click and drag a bounding box on the image to draw a new grid. Adjust the grid by selecting the bounding box and dragging the green arrows on each side. Move the entire grid by dragging the double arrows that appear when hovering on the image.
- Adjust the number of rows and columns by entering new values or using the up or down arrows to incrementally increase or decrease the number of rows or columns.
-
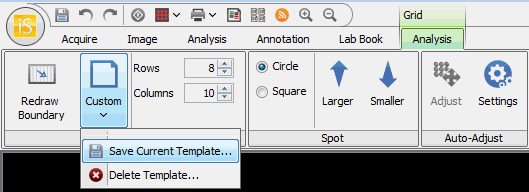
Click on the Grid Template button to choose, save, or delete a template that determines the Grid, Spot, and Background method settings.
Templates are useful for quickly selecting the settings that are commonly used, however, you do not need to use a template to set up a Grid Analysis.
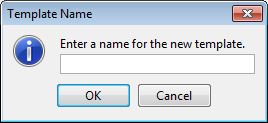
- The Grid Template button resets to Custom when any of the Grid, Spot, or Background method settings are changed. To save the current settings to a new template, click the Grid Template button and choose Save Current Template... from the drop-down menu.
- Enter a name for the new template and click OK.
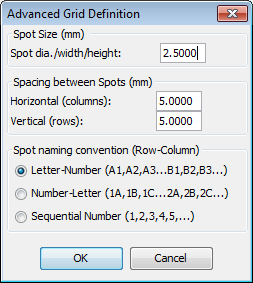
- Click on the small arrow at the right edge of the Grid group to open the Advanced Array Definition dialog where you can set the spot size and the spacing between spots numerically.
-